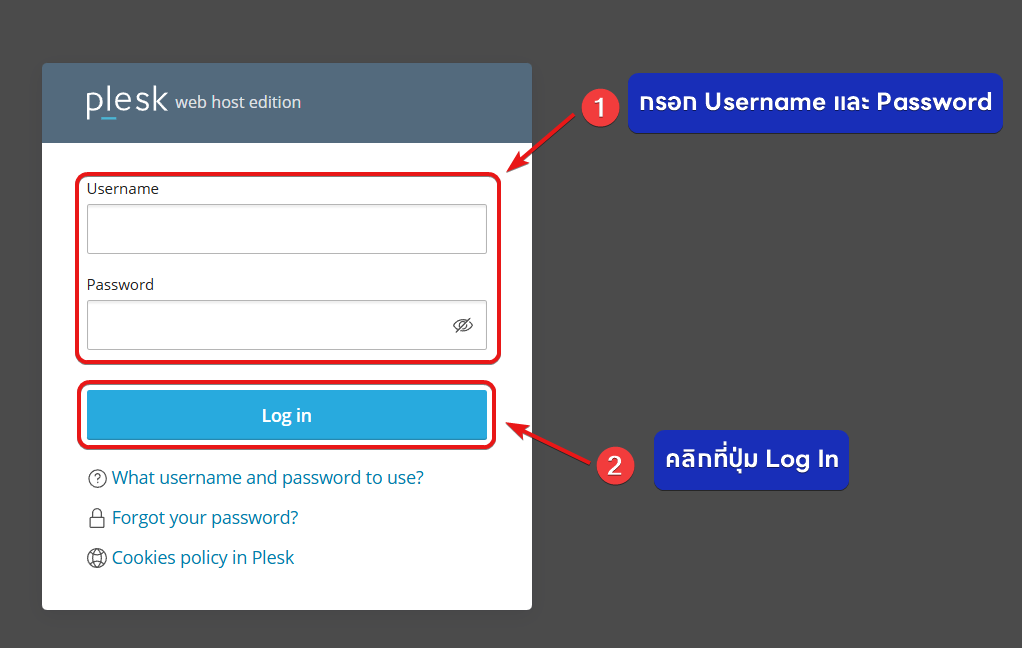
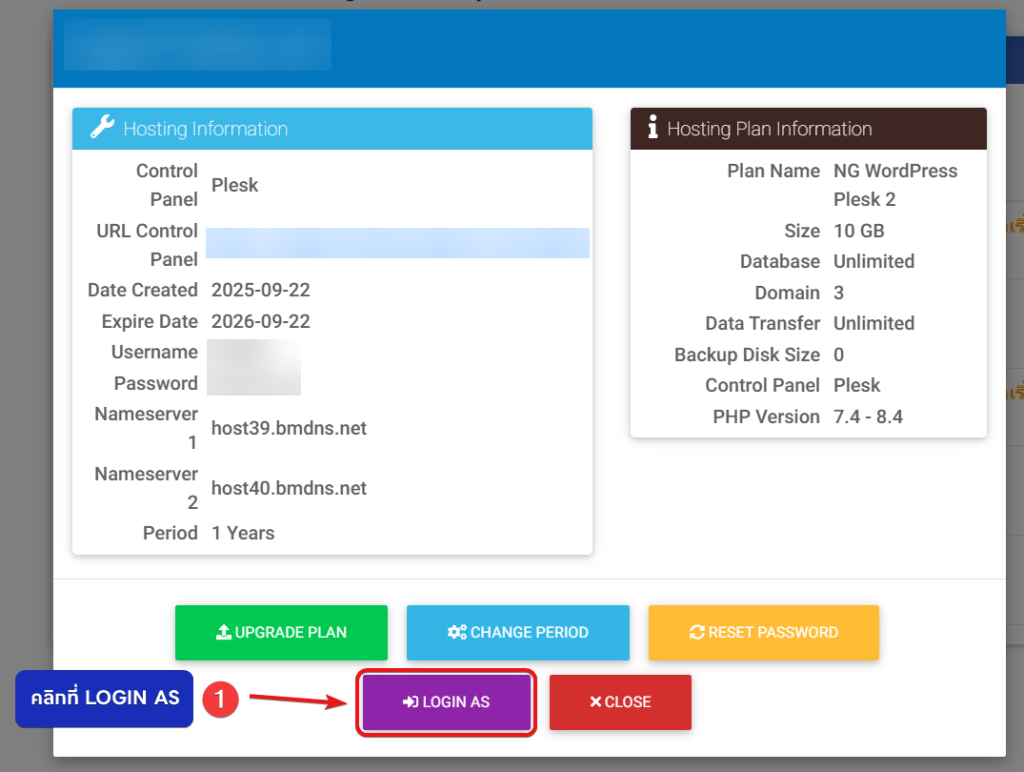
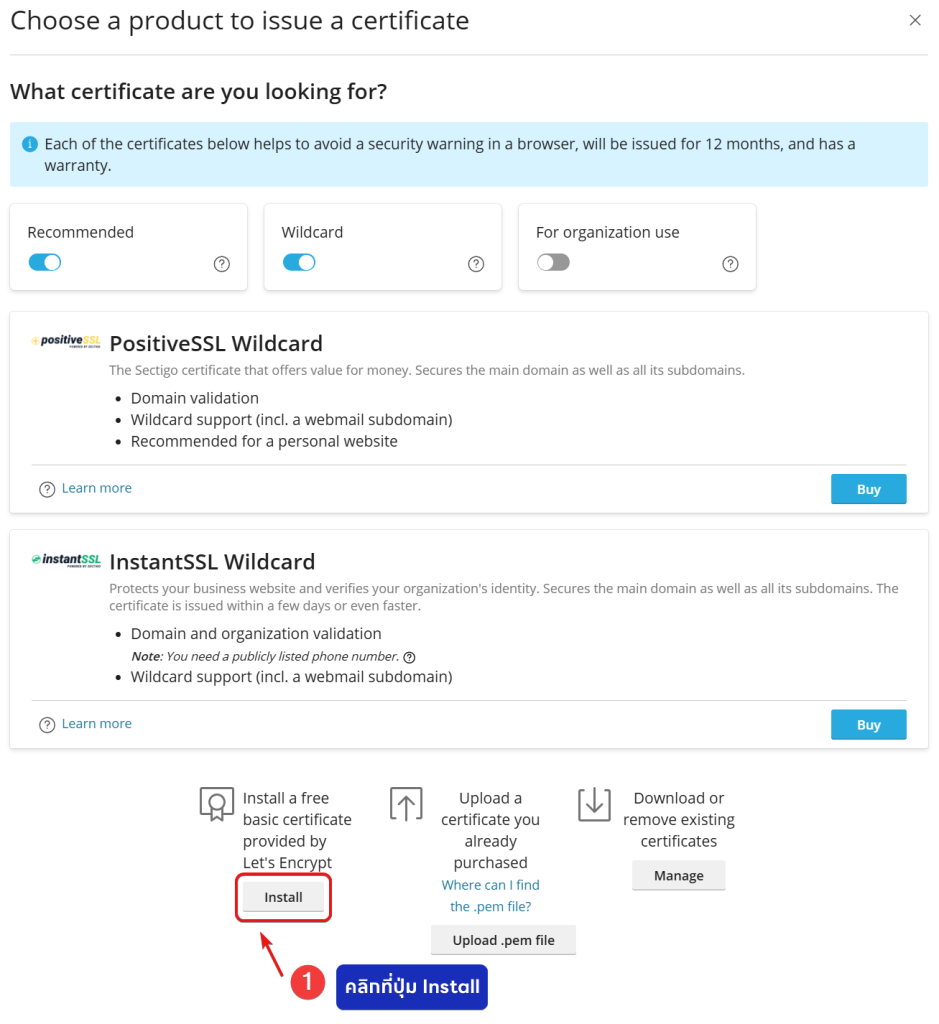
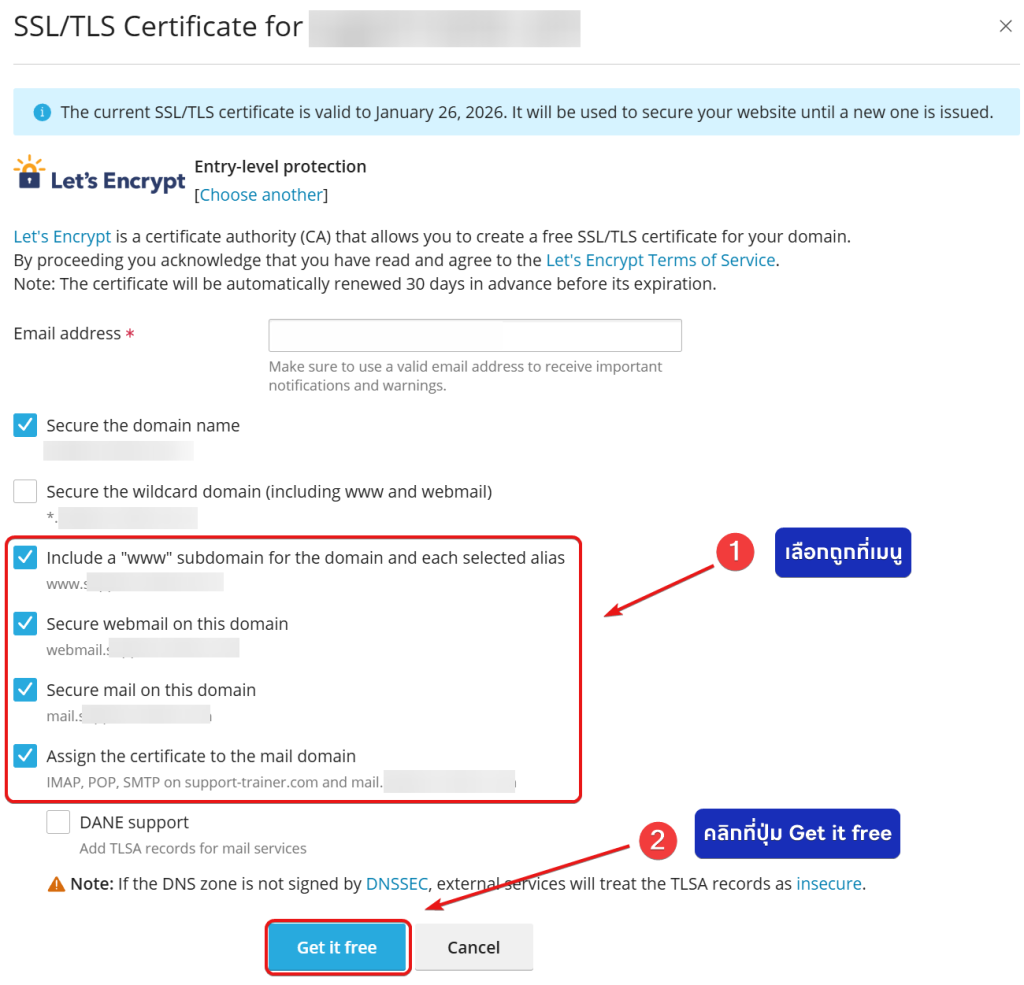
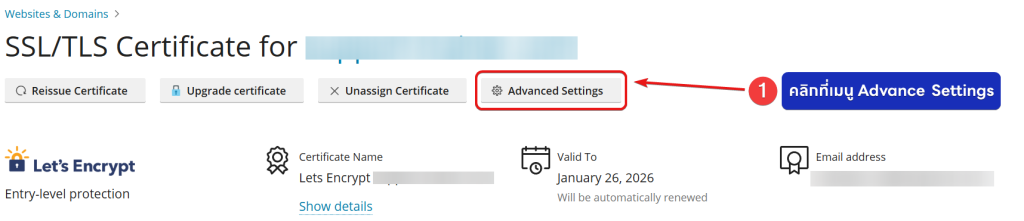
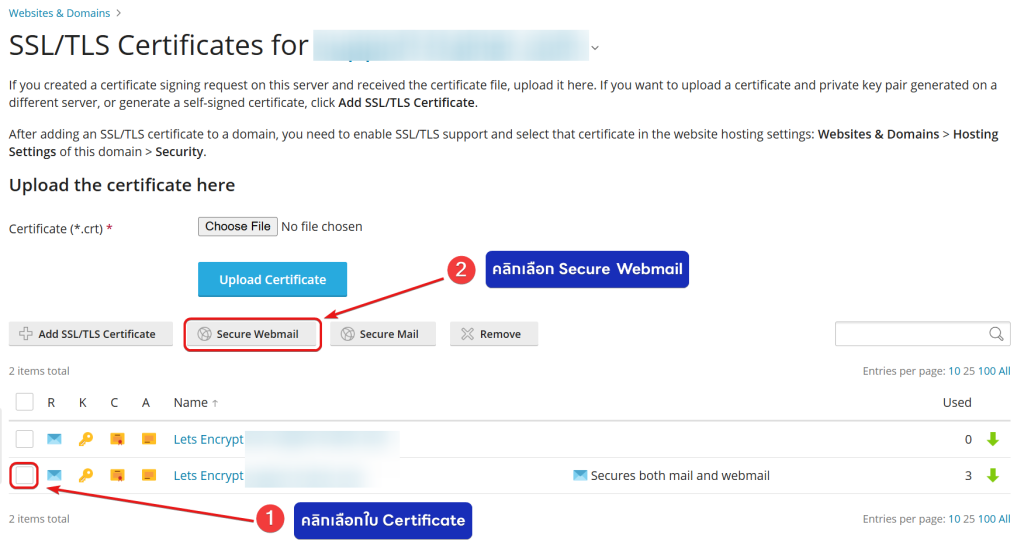
วิธีการทำ Secure Webmail & Secure Mail บน Plesk Created มีนาคม 17, 2020 Author Bangmod Team Category วิธีการใช้งาน Plesk 1. Login เข้าสู่ระบบ Plesk Control Panel ป้อน Username กับ Password ของลูกค้าที่ได้รับทางอีเมลคลิกที่ปุ่ม Log In เพื่อเข้าสู่ระบบ สำหรับบริการ Hosting สามารถ Login As (1) จากหน้า Hosting ของลูกค้า ใน nest.bangmod.cloud 2. หลังจากเข้าสู่ระบบ Plesk Control Panelไปที่เมนู Websites & Domainsคลิกที่ Domain ที่ต้องการทำ Secure Webmail และ Secure Mailคลิกที่เมนู Dashboardคลิกที่เมนู SSL/TLS Certificates เพื่อสร้างใบ Certificates สำหรับทำ Secure Webmail และ Secure Mail 3. ตรวจสอบว่า Webmail access (1) และ Mail access (2) ว่า Secured แล้วหรือยัง ถ้ายังไม่ Secured ทำตามขั้นตอนที่ 4 4. ถ้ายังไม่ Secured ให้คลิกที่เมนู Reissue Certificate (1) 5. คลิกที่ Install (1) เพื่อเริ่มสร้างใบ Certificate 6. เลือกถูกเมนูตามในภาพ (1) แล้วจากนั้นกด Get if free (2) เพื่อสร้างใบ Certificates สำหรับทำ Secure Webmail และ Secure Mail 7. คลิกที่เมนู Advanced Settings (1) เพื่อเลือกใบ Certificates ที่สร้างไว้สำหรับทำ Secure Webmail และ Secure Mail 8. คลิกเลือกใบ Certificate (1) คลิกที่ Secure Webmail (2) สำหรับทำ Secure Webmail 9. หลังจากนั้นทำการคลิกเลือกใบ Certificate (1) คลิกที่ Secure Mail (2) สำหรับทำ Secure Mail 10. ตรวจสอบว่าระบบสร้าง Secure Webmail (1) และ Secure Mail (2) เรียบร้อยแล้ว Was this article helpful? Yes No